Excel to Pandas DataFrame with FussyData
Introduction
This guide will show you how to create an Excel API in FussyData and then load the submitted data directly into a Python Pandas DataFrame for analysis and processing.
Overview
This tutorial will walk you through:
- Creating an Excel API by uploading an Excel sheet as a template
- Finding submissions in the FussyData app
- Getting the Request URL for data access
- Loading data directly into a Pandas DataFrame using Python
Benefits of this approach
- Schema enforcement: Uploading an example spreadsheet defines the canonical schema (column names, order, and types). Submissions are validated on upload, so your DataFrame always conforms to the schema.
- Consistent columns and dtypes: Predictable DataFrame structure simplifies joins, aggregations, and modeling without per-file wrangling.
- Immediate feedback to submitters: Invalid files are rejected at upload with clear error messages, reducing downstream data-quality issues.
- Fast loading: Submissions are exposed as Parquet, enabling efficient
pd.read_parquetwith correct dtypes. - Stable access patterns: Use a specific submission URL for reproducibility or a “View Latest” URL for pipelines that want the newest data.
- Auditability: Each submission includes metadata for lineage and easy re-runs.
Prerequisites
Before starting, make sure you have:
- A FussyData account with API access
- Python installed with pandas and requests libraries
- An Excel file to use as a template
Step 1: Create an Excel API
1.1 Upload Your Excel Template
- Go to app.fussydata.com and log into your account
- Navigate to “Excel to API” or create a new API
- Upload your Excel file as a template
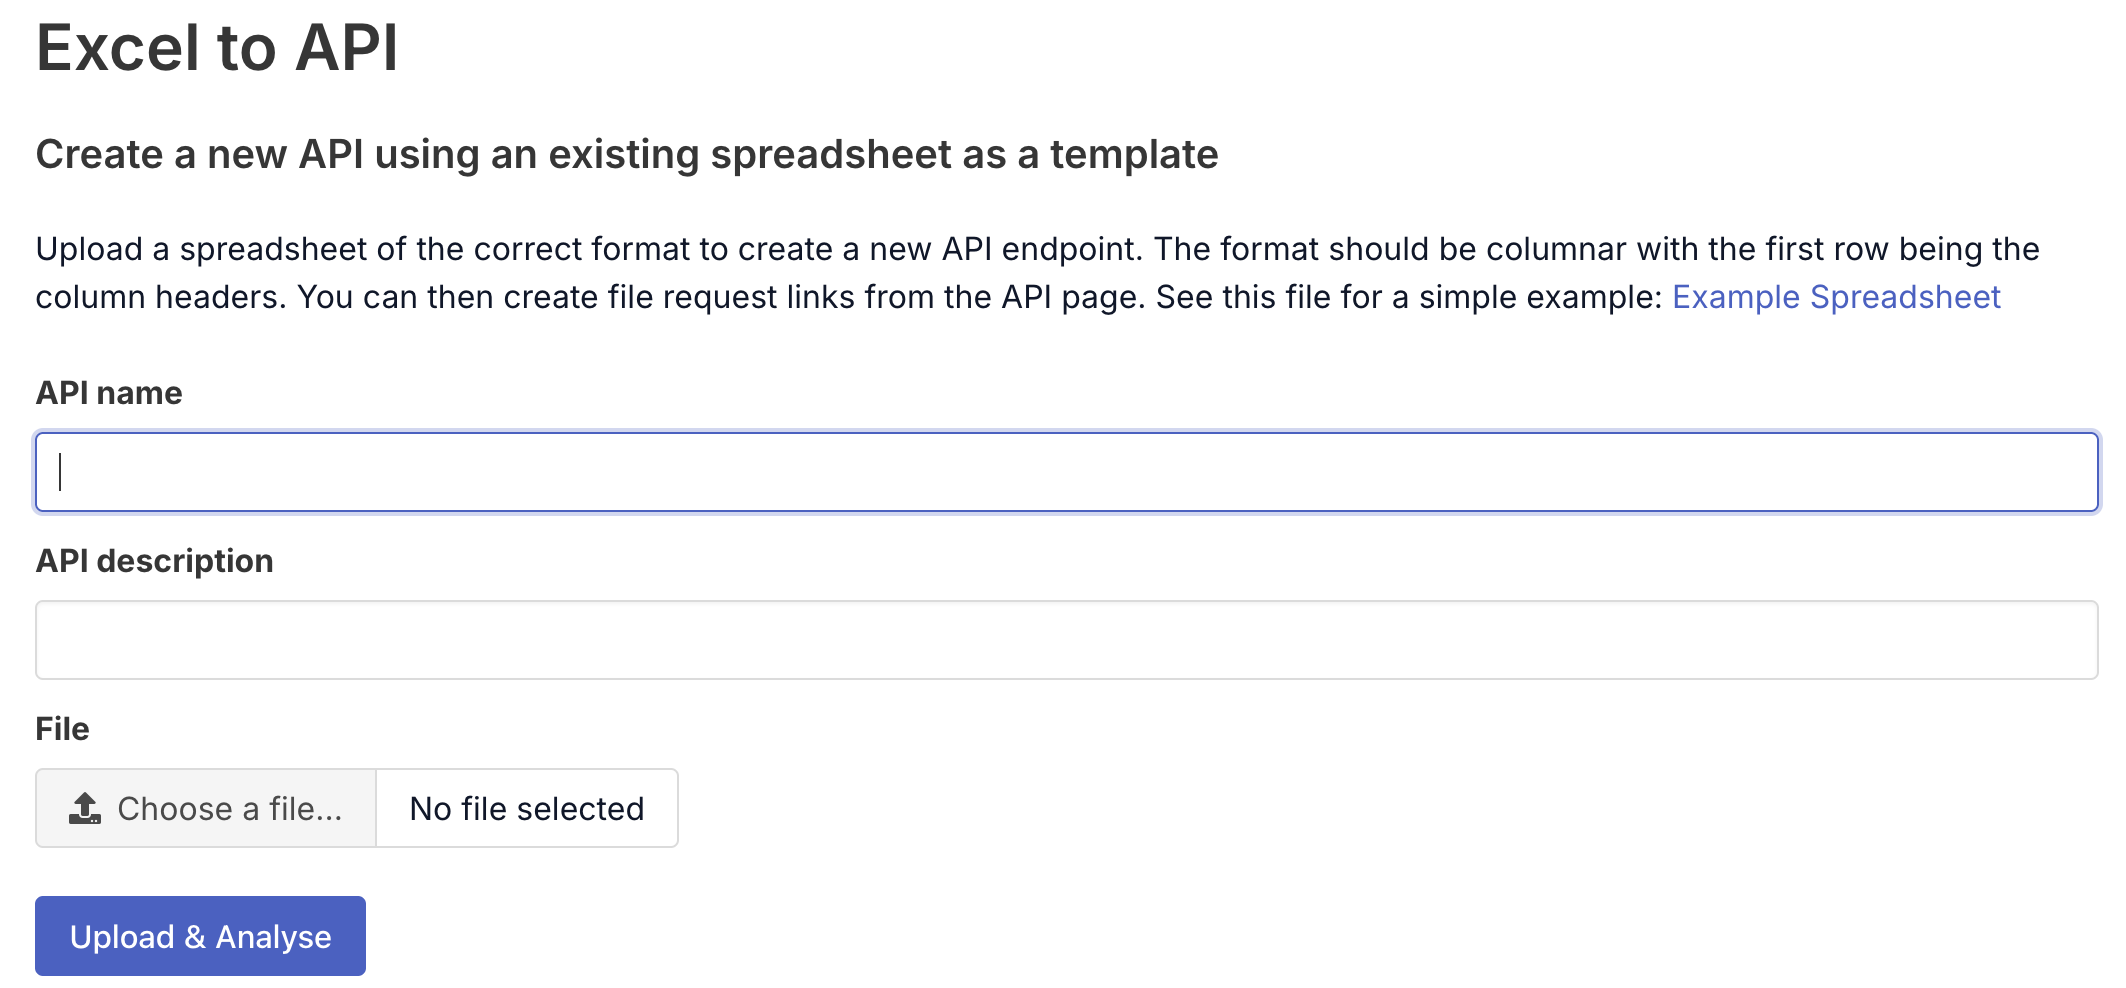
1.2 Configure Your API
- API name: Enter a descriptive name (e.g., “Sales Data Collection”)
- API description: Provide details about what this API collects
- File: Upload your Excel spreadsheet template
1.3 Confirm Schema
Review the detected schema to ensure it matches your expectations:
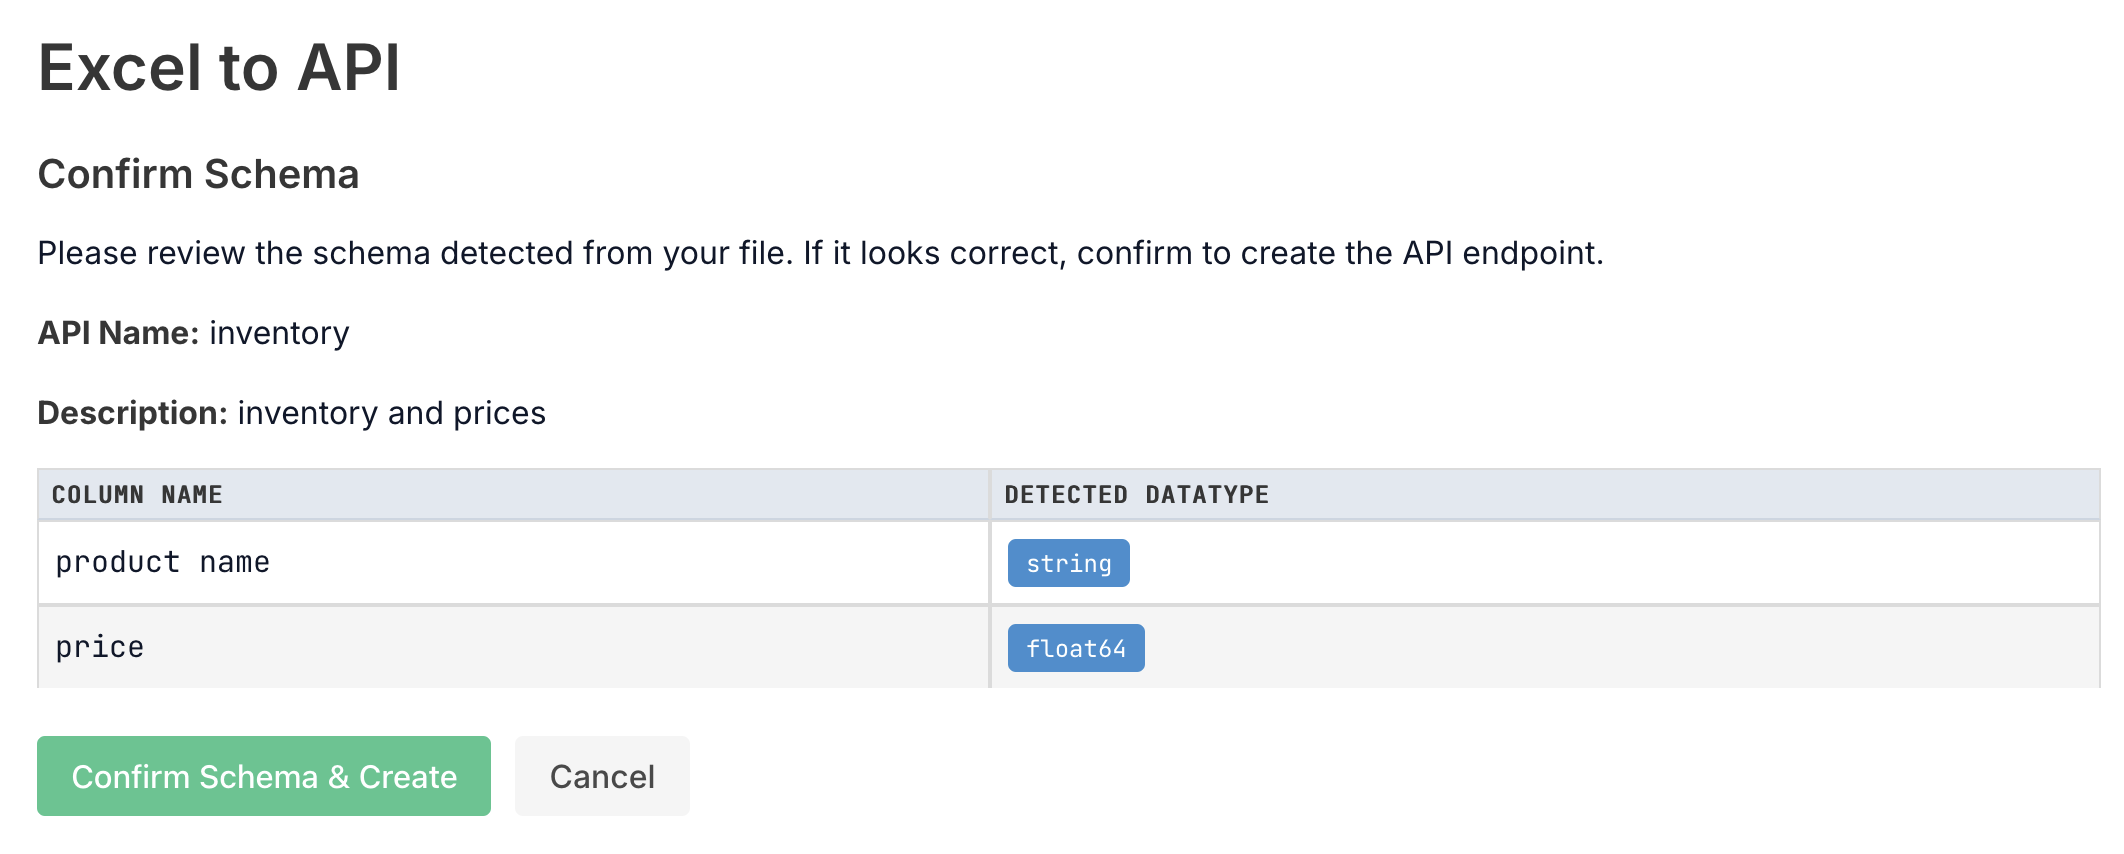
1.4 Create Your API
Click “Create API” to finalize your Excel-based API.
Step 2: Find Submissions and Get Request URL
2.1 Locate Your Submission
After someone submits data to your API:
- Go to “Submissions” in the FussyData app
- Find your submission in the list
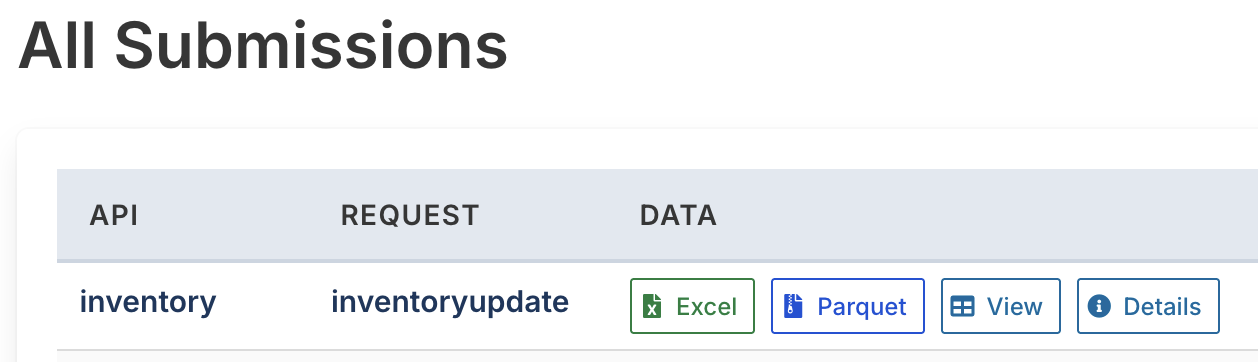
2.2 Get the Request URL
You have two options for getting the data URL:
Option A: Specific Submission
- Click “Details” on a specific submission
- Copy the “Request URL” from the submission details
Option B: Latest Submission (Recommended)
- Go to your API details page
- Click “View Latest” to get the URL that always returns the most recent submission
- Copy the Request URL - this will always fetch the latest data
The URL will look like:
https://app.fussydata.com/api/v1/submission/[submission-uuid]/get_parquet_file?token_uuid=[token-uuid]
Step 3: Load Data into Pandas DataFrame
3.1 Install Required Libraries
First, make sure you have the required Python libraries:
pip install pandas
3.2 Load Data Directly from URL
Use this Python code to load your Excel data directly into a Pandas DataFrame:
import pandas as pd

# Method 1: Direct URL loading with pandas
token_uuid = "<insert api token uuid here>"
url = f"https://app.fussydata.com/api/v1/submission/f7087d06-ba9b-4674-b0b5-45664e65a76e/get_parquet_file?token_uuid={token_uuid}"

# Load directly from URL
df = pd.read_parquet(url)
print(df)
Example Output: When you run this code, you’ll see output like this:
    product     name        price
0   gala        apples      1.9
1   sourdough   bagels      1.6
2   organic     bananas     1.8
This shows a simple DataFrame with product names and prices loaded directly from your FussyData submission.
Best Practices
1. URL Management
- Use “View Latest” URLs for automated scripts that need the most recent data
- Use specific submission URLs when you need data from a particular submission
- Store URLs securely - they contain authentication tokens
Next Steps
After loading your data into Pandas:
- Data Analysis: Use pandas’ powerful analysis capabilities
- Visualization: Create charts with matplotlib or seaborn
- Machine Learning: Use scikit-learn for predictive modeling
- Ingest: Feed data to other systems
- Automation: Set up scheduled scripts to regularly fetch new data
Related Resources
- FussyData API Documentation
- n8n Integration Guide - for automated workflows