Excel to Table
Overview
Each Table defines what schema data submissions must follow. The easiest way to get started is to upload a spreadsheet of the correct format to imply the schema used.
The format should be columnar with the first row being the column headers. You can then create file request links from the Table page.
Creating a Table from Excel
Step 1: Prepare Your Spreadsheet
Ensure your spreadsheet follows the correct format:
- Columnar structure: Data organized in columns
- Header row: First row contains column headers
- Consistent data types: Each column should contain similar data types
See this file for a simple example: example_upload.xlsx
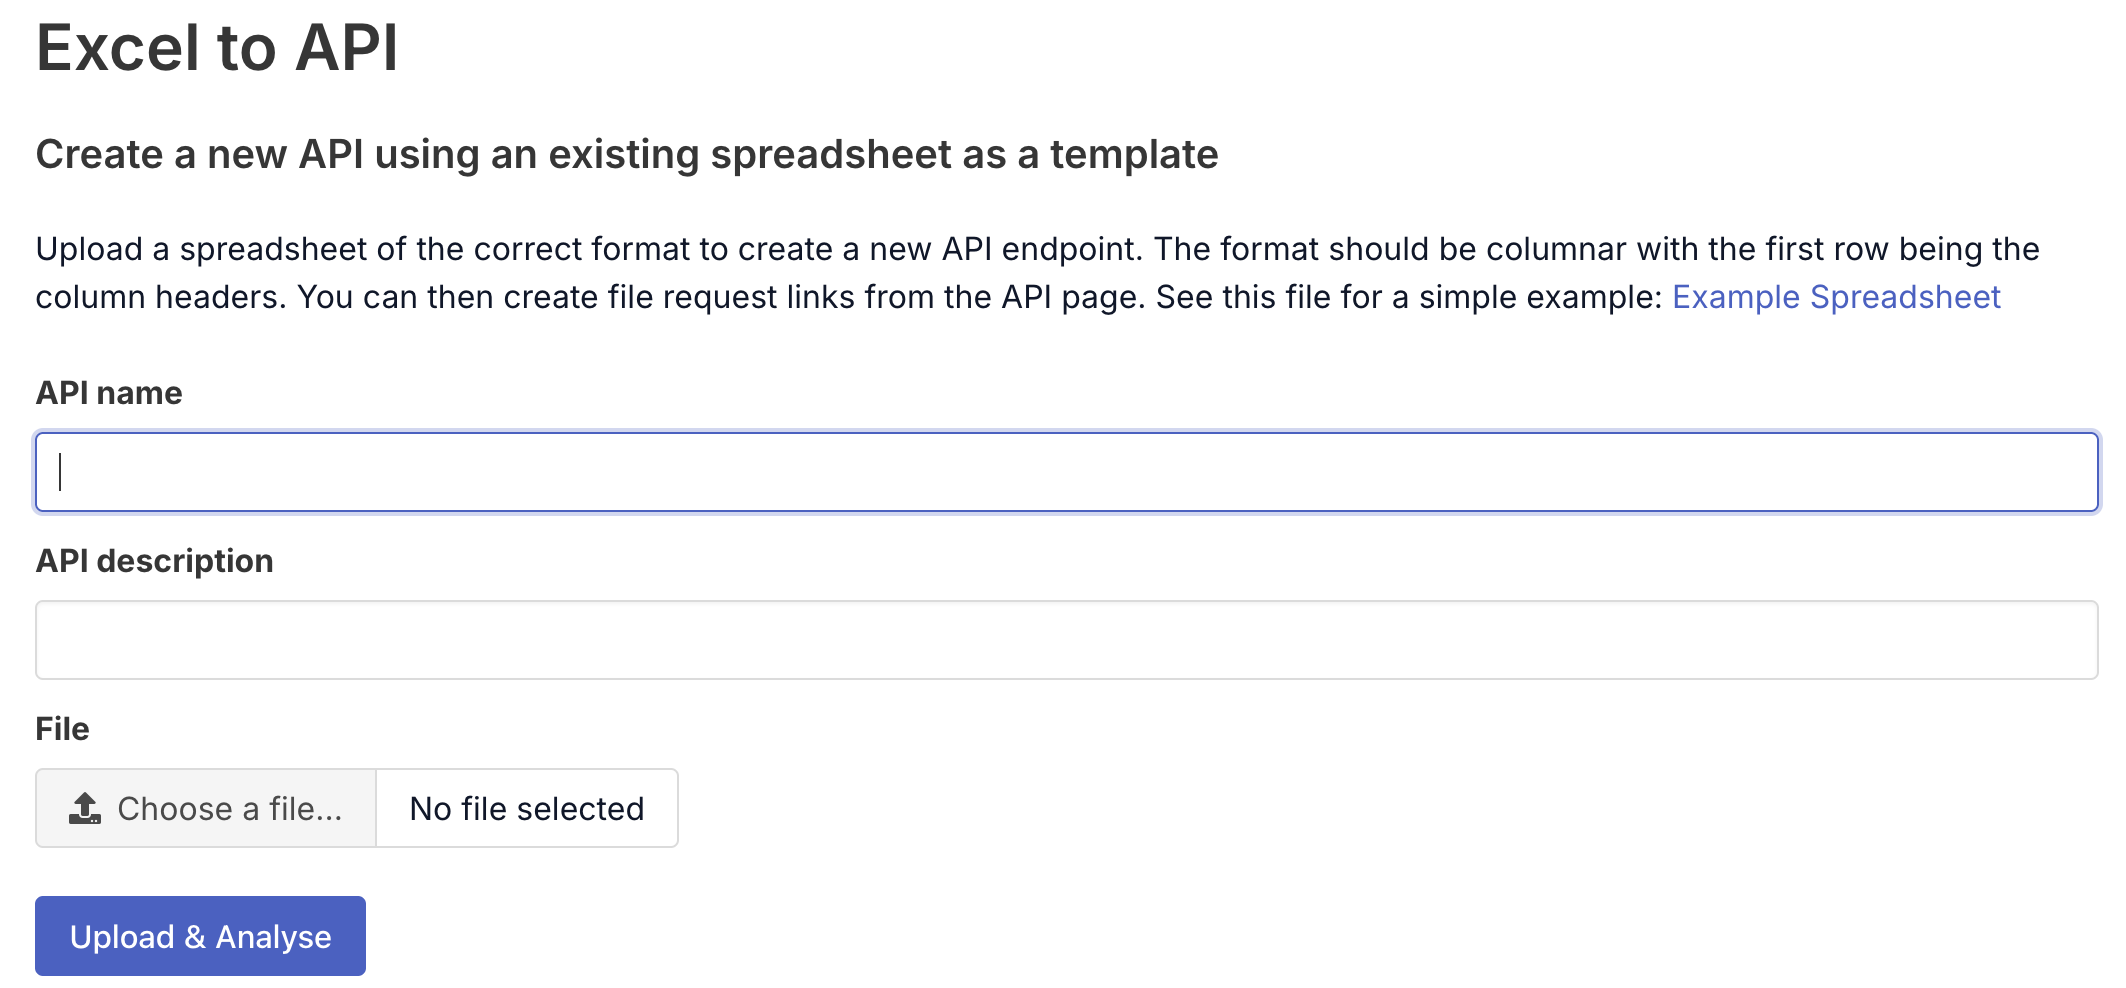
Step 2: Upload and Configure
- Table name: Enter a descriptive name for your Table
- Table description: Provide details about what this Table collects
- File: Upload your Excel spreadsheet
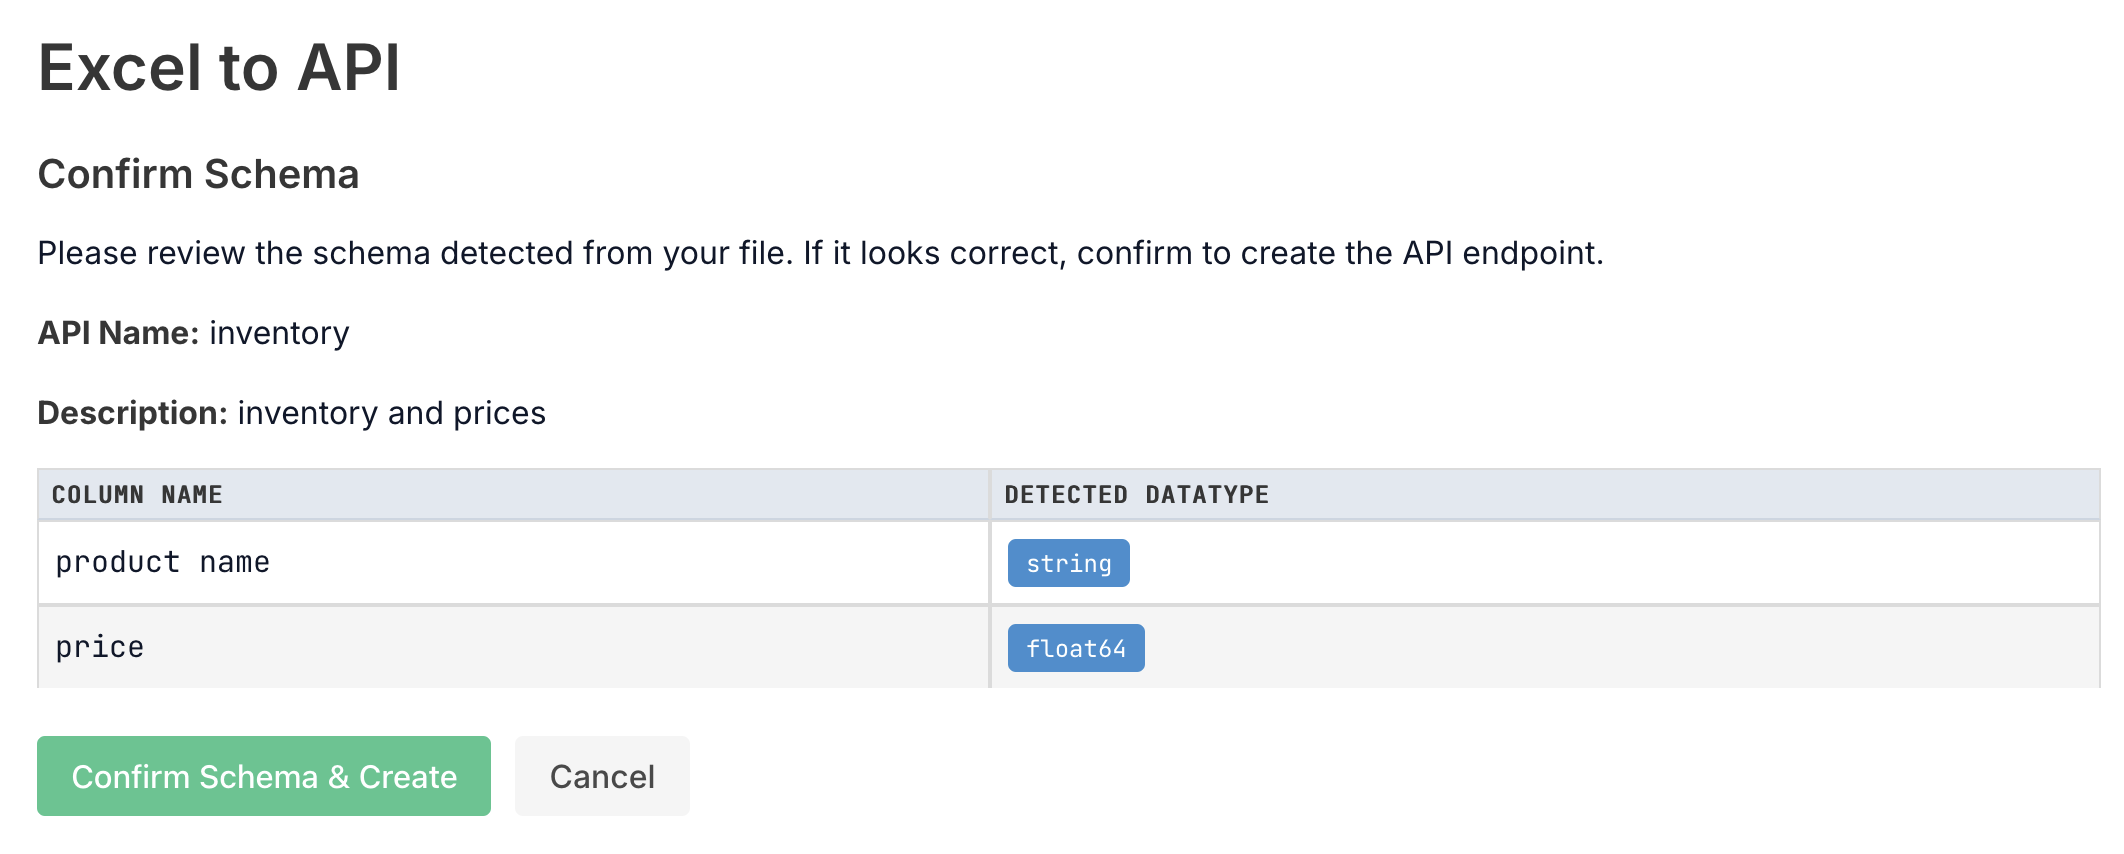
Step 3: Confirm Schema
Before creating your Table, review the detected schema to ensure it matches your expectations:
Step 4: Table Created
After confirming the schema, your Table will be created and you’ll see the Table details page:
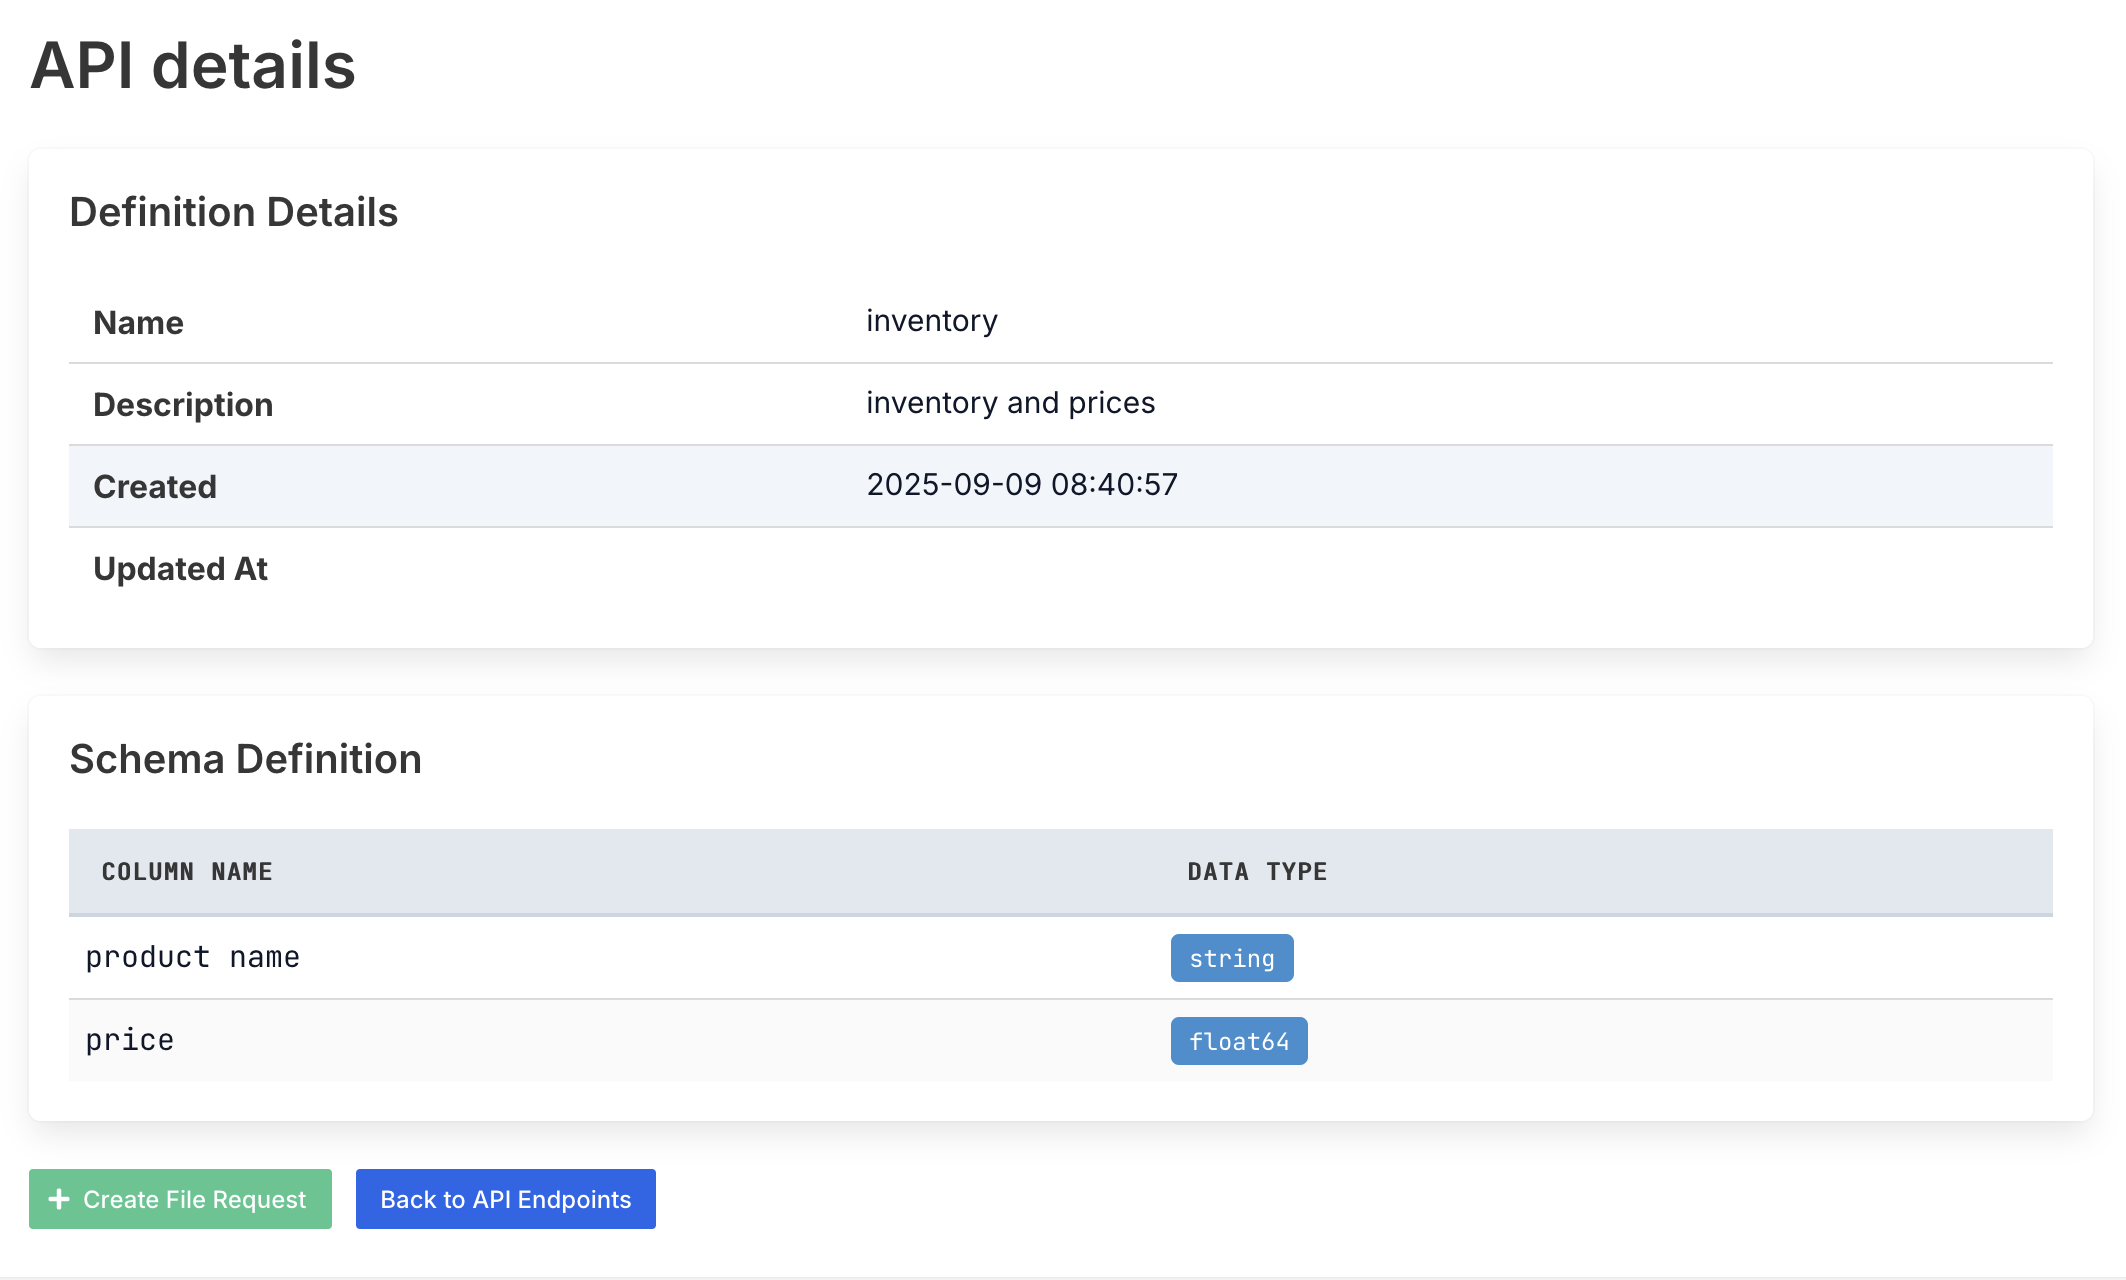
Step 5: Create File Request Links
Once your Table is created, you can generate file request links from the Table page to allow users to submit data that matches your template format.
Next Steps
After creating your Table you can:
- Create file request links for data collection
- Set up destinations for processed data
- Configure webhooks for integration with other systems